|
Can I request time off, clock in, and/or view my paychecks in this system?
No, this is an onboarding software to help with your new hire paper work and, in some cases, open enrollment or yearly updated policy forms. Please contact your HR department for any payroll questions you may have. |
|
Can I view a copy of the Employee Disclaimer?
Yes! Click here to view the Employee Disclaimer that each employee views and agrees to when creating an account. |
|
Can you link a large document to a form?
Yes we can add a link for a question that is asked on a form. We ocassionally see this used for Premium health insurance rates and/or employee handbooks. If you are wanting the employee to read (scroll) through the full document then we would just add the full document before getting to the acknowledgement page. |
|
Do I have to approve each form/signature submitted?
No, If you have a form that does not need a signature from you (manager, HR, employer), then you can use our auto approved feature on that form. You will still be able to see it is submitted and be notified once it is completed, but you do not have to go in and manually approve this form. |
|
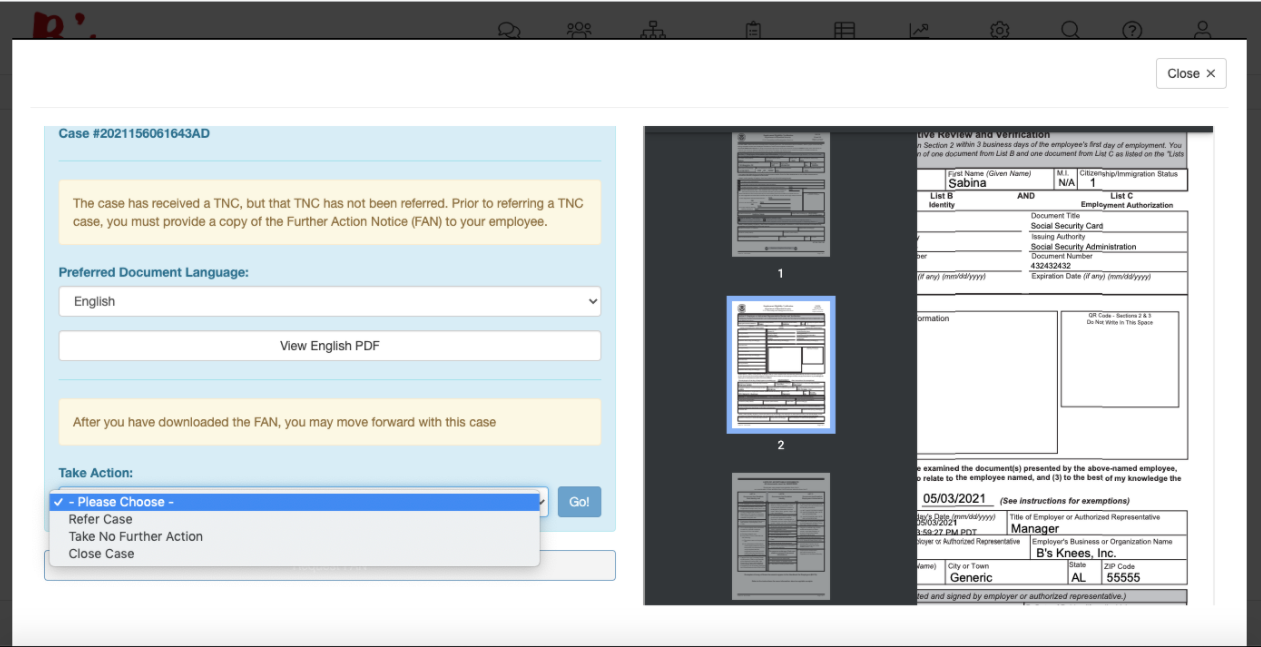
How do I close an eVerify case?
If you are using our eVerify Services, the case will be automatically closed once you successfully eVerify the employee. |
|
How do I edit the text that my employees see?
There are several areas in the system where you can customize the verbiage to better match your company needs. The three main areas will be the:
- Activation Email
- Employee Dashboard (Landing Page)
- All Forms Submitted
There are other pages including the Employee Information page which displays to the new hire when they need to update their name, gender, or birthdate, and the Select Available Forms page which displays to the new hire with the list of documents in their packet. The process to update all of the pages will be the same.
Where to Access
Use the Page to Edit Drop-down menu to select the page you want to customize. The default text will be in the top box. You are not able to adjust the default text.
* On the Activation Email, the system will automatically add your logo above the custom message and the username, password, and link to activate the account below the custom message when it gets sent to the new hire.
Select the radio button next to the Use Custom Text box below the default text area. Use the formatting tools in the custom text box to adjust the verbiage as needed.
This is a sample of the email that the new hire will receive.
Some ideas for the Employee Landing page (or Employee Dashboard):
- Welcome message
- Letter or message from your President/CEO/HR Team/etc.
- Mission Statement
- Values
- Safety or Training Video
- Video about the company/organization
- Links to handbook, policies, or other documents to review (read only)
- Pictures of Upper Management/HR Team/etc.
- Information about culture
and much more.... |
|
How do I have access to our employees filled out forms?
You can log inat anytime to your HR account and view, manage, or print a copy of any submitted form. If you have thousands of forms you want downloaded, we do have an option for a fee to create a download for all your employee submitted forms. |
|
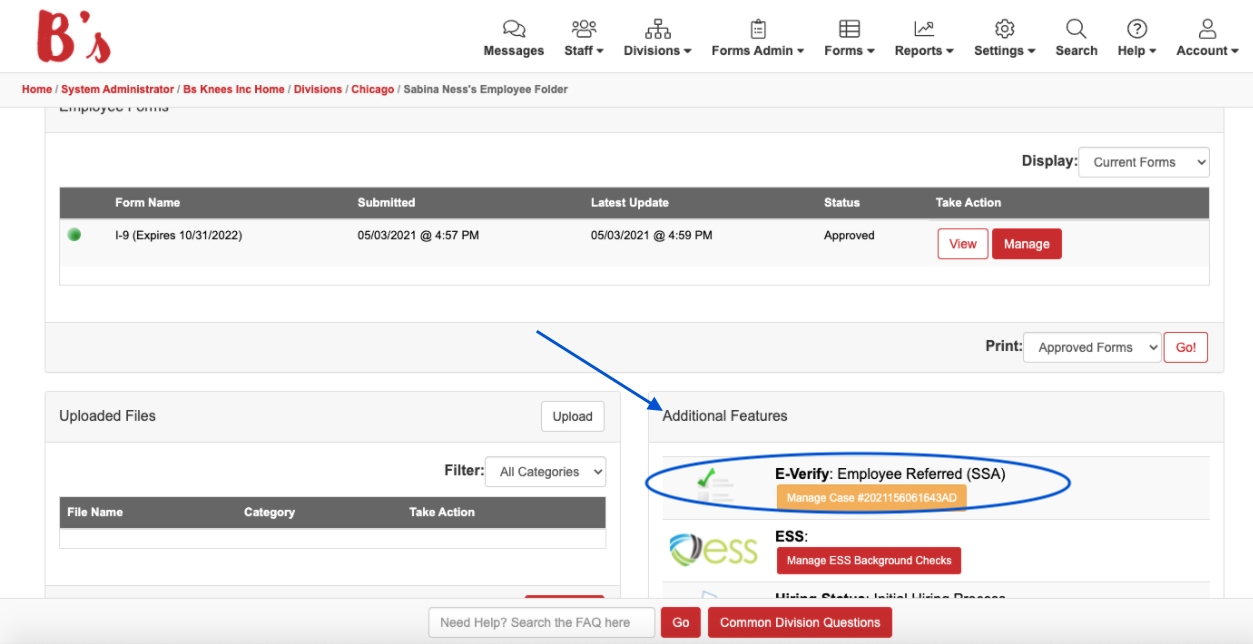
How do I initiate eVerify?
If your company is using eVerify, it will be triggered by approving the I9. There will be a pop-up once the I9 is approved to prompt you through the steps to complete eVerify. NOTE: You have three days to complete this process. If you are not going to run the eVerify section, you are able to close out and use the message center to notify your Admins that the new hire is ready to be sent to eVerify. Contact your Human Resources if you have any questions. |
|
How do I pre-populate a form?
Some company documents may need to have standard information entered by the HR staff (company name, address, federal ID, etc.) The ability to pre-populate a form allows HR Admins to enter this type of repetitious information once so that the information is automatically inserted on the form. This saves time so that HR Staff will not have to add this information each time they need to review/approve employee forms. This feature allows standard information to be added for the entire company as well as for specific divisions or locations as needed. |
|
How do I update our form to the new version?
If you have a recent version of your form that you need to replace an outdated one - then simply email it to us with a note that you are submitting this new version to replace _______ form "the older version". |
|
How Do I upload a Company Flyer
How Do I Upload a New Flyer
Flyers are a handy tool for sharing important documents to staff that do not require a signature. Flyers are great for sharing employee handbooks, posters, notices, etc.
Navigate to the Flyers page
Begin on the company's home page. The easiest way to navigate to the home page is to select the company’s logo at the top left of the page.

Here, select Settings at the top of the page.

In the drop down menu select Flyers.

Flyers Management Page
Here you will see a list of all of your current flyers. You have the option to view, edit, and delete your current flyers. You can also choose who can access them with the Assign to Divisions option. At the bottom of the list select Create a New Flyer.

Uploading a Flyer
Enter the Flyer name and description. You can select whether you want the flyer to be active or not. This is useful if you are getting a flyer ready that you plan on making active later. Select the choose file button.

Select the PDF file that you wish to upload. After confirming that the correct file has been chosen, select Submit to continue.

Now you will be prompted to assign the Flyer to a division. Select all the divisions that you want to have access to the new flyer. To complete the process select Submit.

You will be returned to the Flyer management page. To confirm that your upload was completed, check for your flyer in the Flyer list.

|
|
How will I know when I have an account with you?
We will send you an email to notify you that an account has been created for you on the web site. This email will have a link to activate your account (with a temporary password). Once logged in you will complete your onboarding and HR paperwork for your employer. |
|
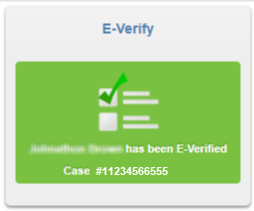
How will it display if eVerify is complete?
Once eVerify has been initiated and complete with no issues, you will see a green "Verified" Case displayed at the bottom of the employee's record with the case number displayed. |
|
How will it display if eVerify is complete?
Once eVerify has been initiated and complete, with no issues you will see a "Verified" Case displayed at the bottom of the employee's record.
|
|
I am having trouble viewing a form in PDF format.
The following may help you with viewing applications: Make sure that Adobe Reader (or another PDF Reader) is installed on your computer. Make sure you are able to view PDF's in the browser. |
|
I have a question about something that is not listed above.
|
|
I have an upload file section, what do I do with this? What documents do I need to upload here?
This is a feature that some HR Departments use. If they do utilize this then when you click on it - you will be provided with what is being requested from you. Normally it would be, identification, voided checks, or certificates that HR needs to have on file. You can attach the document by scanning it in or you can take a picture on your smart device and attach it from your smart device. |
|
I have details that I need to enter for each employee prior to them seeing the questions, how can I do that?
Our Front end questions will give you, HR, the opportunity to fill out questions prior to the employee seeing the form. ie: pay rate, PTO hours, etc. You also can prefill an answer so you do not have to type it out every time, but it is editable so if that the prefill answer needs to be changed as a one off instance you can. In addition, typing them into a text box you can provide the details to make these into a drop down menu, making the details more consistent. ie: location, manager's name, etc. |
|
I have questions about my current forms, benefits, or requirements.
If you have any questions concerning any of your new hire paperwork, including benefit forms, submitted forms, or tax forms, please contact your HR department or manager directly.
|
|
Is there a way for the system to auto-assign a division or form to HR Staff?
Yes, you can assisgn a form to a certain HR Staff member. If there is only 1 HR staff member in a division then they will automatically be assigned the form. all forms go into the "unassigned forms" area. There is a company setting that decides what the staff members are allowed to do at that point. Also you can disable a HR staff member from having access. |
|
Is your software PCI compliant?
Yes, we are PCI compliant. |
|
My account is locked and it says to contact HR department, can you help me out?
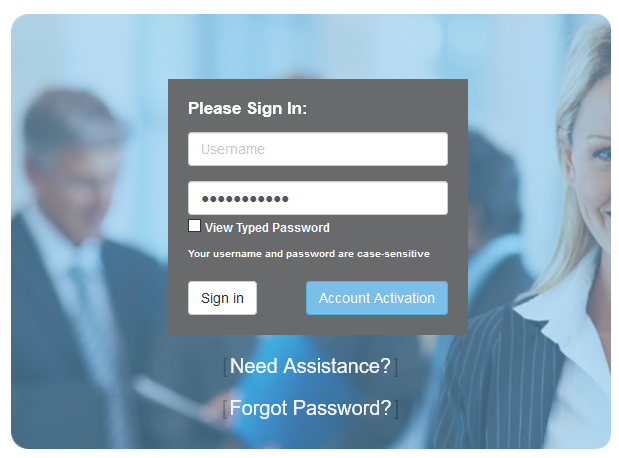
We can assist you with a password reset. Just for future knowledge our system is case sensitive, so even a space on the end of either will not allow you to login.
When logging in to TraitSet OnBoard - Powered By 321Forms, remember that all usernames and passwords are case-sensitive.
For example, if your username is 'JohnDoe', you must enter the exact letters as 'JohnDoe'. Typing 'johndoe' will not work.
Your password works the same way. Also remember to not add any spaces in the middle or at the end of your username or password.
You can also use the "View Typed Password" checkbox to display the password.
If you still cannot get logged in, visit the forgotten password page to reset your password. If you don't remember your username you will need to contact your employer. |
|
Standard Tax forms?
We have the I-9, W4 and state tax forms already programmed to add to your site. Just let us know which state forms your company will be using and we can get those implemented quickly. |
|
What browsers do you support?
We currently support Internet Explorer 11, Microsoft Edge, Safari, Firefox & Chrome. Keep in mind that as these browsers retire versions we will no longer guarantee that they will function as expected.
To see what the latest status is of Internet Explorer versions supported you can click on the following link:
https://support.microsoft.com/en-us/help/17454/lifecycle-faq-internet-explorer |
|
What can I do in my account?
Your account is designed for all your onboarding and ongoing HR forms to be filled out, stored, and accessed at anytime by you or your employer. You can print a copy of your forms, review them, get additional information on flyers and more.Your account is designed for all your onboarding and ongoing HR forms to be filled out, stored, and accessed at any time by you or your employer. You can print a copy of your forms, review them, get additional information on flyers and more. |
|
What if I need a third parties signature on a form (like a parent or drug screening agent)?
We do not provide logins for a 3rd party - so this form would need to be printed, signed at the location, and returned to HR. |
|
What is a mark up call?
When implementing several complex forms at one time - we will schedule a call with you to go over these complex forms to make sure that we know how you need it to behave. Some choices are Employer questions prior to the employee seeing them, Employee questions, or Employer Review questions after the employee fills the form out. You can also choose if you want this form to be automatically approved or not - if you have employer review questions at the end of this form you can not use the auto approved feature. |
|
What is E-Verify?
E-Verify is a web-based system that allows enrolled employers to confirm the eligibility of their employees to work in the United States. E-Verify employers verify the identity and employment eligibility of newly hired employees by electronically matching information provided by employees on the Form I-9, Employment Eligibility Verification, against records available to the Social Security Administration (SSA) and the Department of Homeland Security (DHS). |
|
What is in my Employee Information Section?
In the employee information section, you can view your basic details; such as your name, phone, username, password, date of birth and more.
|
|
What is included within each of the signatures on each form?
We recommend that after each electronic signature there is a Date location/field. In this spot we will enter the Date and the Time of the signature. This is for both the employee's signature and the employer's review signature. The date and time makes it legally binding as an electronic signature. |
|
What is the Message Center?
The Messaging Center allows you to communicate through the system. These conversations are then stored in your message box. The recipient will receive an email notifying them of a message, but will need to log in to see the message. It will be highlighted in red for them to see. The messaging system is used for more sensitive information that may not be appropriate for email, and can also be useful if the user sending the message does not want to open their email client to send a direction to an employee. |
|
What is the requirement for my password in the system?
When logging in to TraitSet OnBoard - Powered By 321Forms, remember that all usernames and passwords are case-sensitive.
For example, if your username is 'JohnDoe', you must enter the exact letters as 'JohnDoe'. Typing 'johndoe' will not work.
Your password works the same way.
Also, remember to not add any spaces in the middle or at the end of your username or password.
You can also use the "View Typed Password" checkbox to display the password.
If you still cannot get logged in, visit the forgotten password page to reset your password. If you don't remember your username you will need to contact your employer. |
|
What reporting options do I have to extract data?
You can use one of our templates in reports or you can custom create your own. They are easy click and drag colums that you can export into a spreadsheet or other file type. Frequently used for Payroll providers, with the ability to export employee information and import into your payroll system. . |
|
Where can I get a copy or view company polices/flyers?
From your account dashboard, select company information, then click into the flyer you would like to review or you can click the link to the company's website. |
|
Who can I speak with about questions I have on my new hire paperwork?
If you have any questions concerning your new hire paperwork, please contact your HR department or manager directly. |
|
Who can use the message center in my account?
The message center allows communication between employees and HR staff directly through the employee’s account. This can be used for more sensitive information which may not be appropriate for email. These conversations are stored in the message box. The recipient will receive an email notifying them of a message, but will need to log in to see the message. The message will be highlighted in red. |
|
Will I get notifications of changes made on my account?
You will receive notifications when a form has been rejected and needs to be updated or if new forms have been assigned to you. You also may receive confidential messages in the message center.
|